Are you unhappy with your car background? An ugly background makes your masterpiece shot distractive. Composite Car Images into New Background can solve all those background issues. It is fun to transform existing shots into an eye-catchy automotive portrait.
Automotive dealers are looking for this opportunity to fix their valuable shots. I will share a complete guide on how to composite car images into a new background in Photoshop. You will get the whole transforming process in Photoshop, including blending the car with its new transparent environment to make it realistic.
An appealing background can enhance the beauty of your car. The best part is it can grab the client’s attention. Compositing cars into an attractive background ultimately increase your sales & brings new clients. Let’s learn how to do it.
Overview of Composite Car Images into a New Background like a Pro
Compositing a car background is an advanced photo editing trick, a combination of several photoshop techniques. This includes a car clipping path to make the background transparent and then replacing the background with a more suitable one.
Moreover, car photo retouching techniques such as cleaning up the dust, glass reflection, glare removing, blurring, color adjustment, and others are required. The goal is to create a beautiful & attractive image that sells.
As a result, you will be surprised to know an appealing car composition can make your automotive photo stand out in the town. It can create a huge difference with competitors. It allows playing with reflections & fixing all types of imperfection to deliver a perfect automotive photo. This is the secret of successful automotive dealer Marketing.
Composite Car Images into a New Background is Challenging
Compositing a car into a new background is challenging. Firstly, car edges are not smooth or straight. It contains curves & uneven edges. That needs manual selection with the pen tool. Expert photo editors have depth control on drawing path & give an efficient path without losing a single pixel.
Unfortunately, newbie editors can harm your valuable pixel & spoil your shots. Experience can make a difference.
Well, it’s not all about making a path & clipping it from the original background. Another critical task is to visualize an appealing composition for the car. Then evaluate your imagination in reality by compositing a new background. You must need proper blending to adjust the car with this new background.
Here your priority is to make the image both focusing & realistic. Transforming should contain a perfect background that is capable of grabbing attention.
Otherwise, it will be a wastage of time & dedication. It’s fun to convert ugly images into attractive ones. You can do it if you follow the below steps accurately. But practice is a must if you aim for perfection.
You can be surprised to know an appealing car composition can make your automotive photo stand out in the town. It can create a huge difference with competitors. It allows playing with reflections & fixing all types of imperfection to deliver a perfect automotive photo. This is the secret of a successful automotive dealer.
Benefits of Composite Car Images into a New Background
While you are doing a Photoshoot, it’s impossible to find out an appealing background for all individual cars. Besides, it’s natural to get some color issues due to lighting. Sometimes direct sunlight can burn the original color.
Moreover, there is a chance of getting unwanted objects in your frame. Aside from all of these, the shots can contain dirt, dust, or any other scratch that can decrease the car’s beauty.
In automotive photography, reflection & shadow is the life of the picture. It can bring a dynamic vibe in a static shot. Unfortunately, while you are using a circular polarizing filter in a camera that harms your reflections & derives a poor picture. Photo editors can solve this type of problem & enhance the beauty of your car. Image Post-processing helps to bring perfection to your photo.
Why Use Composite Photos?
In the automotive business, the composite image is robustly essential to bring focus on cars. Composite images are providing an impossible combination. For example, you live in a small city but want to reflect a mountain or eye-fell tower. Composite photos are the only solution to attach your original photos to a suitable one.
Moreover, sometimes it is difficult to capture the expected moments. Besides, bringing a proper composition for each shot is time-consuming & difficult for a photographer. Compositing is a solution to reduce photography costs. You don’t need to worry about the background.
Composite car images offer to blend several backgrounds with balance lighting to deliver a masterpiece shot. Frankly speaking, it’s quite impossible to bring those stunning shots due to light, nature & environmental issues.
It’s a great way to convert focus to the main subject. The automotive business can grow rapidly with those focusing shots. However, eye-grabbing composite images are a mixture of static car & dynamic elements.
Step By Step Tutorial to Composite Car Images into a New Background
To composite car images into a new background, we will use the below image and composite it to another background.
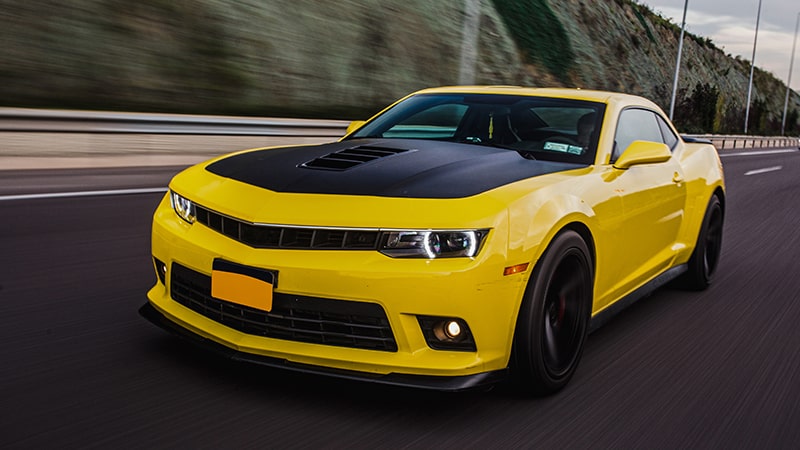
Here is the before-after example of it.

The first step is to clip the car from the original background. Photoshop has a magical weapon pen tool to do this task correctly. Any other tools are unable to provide such flexibility & depth control to make an accurate cutout. If you don’t want to lose image quality, then a pen tool is a must.
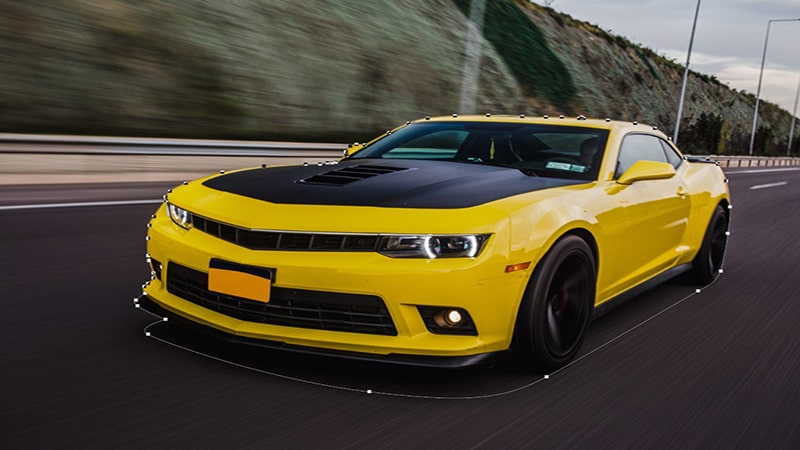
Step 1: Extracting The Car From the Background
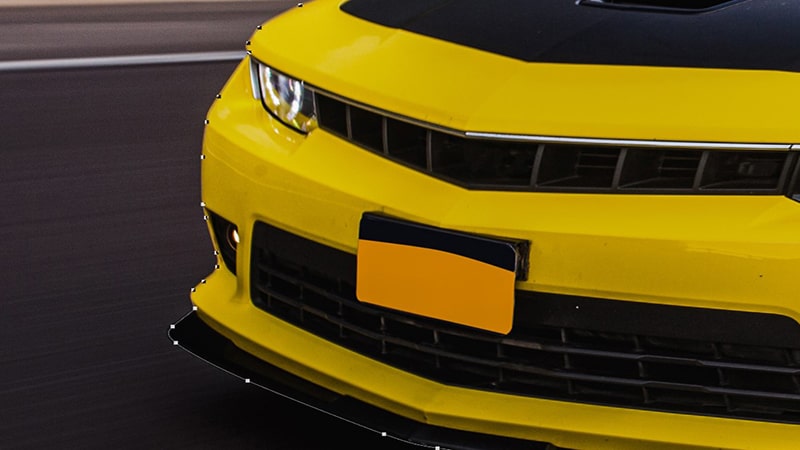
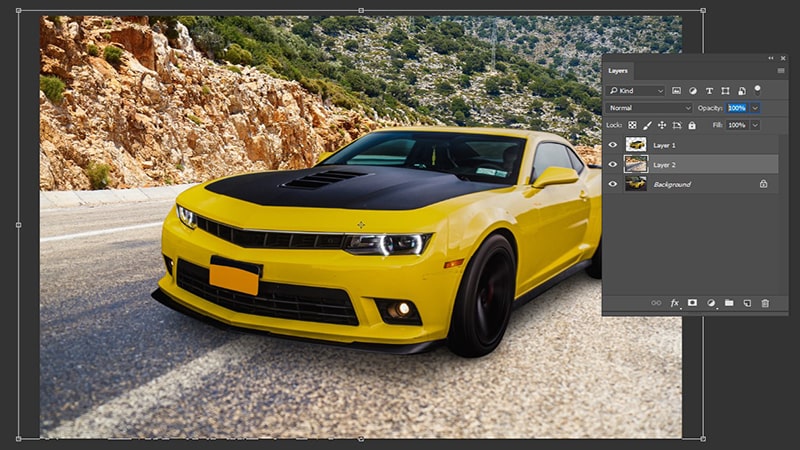
Zoom in the photo 200%. Then draw the outline path carefully. Here, I will suggest keeping a couple of pixels. Now, make the outline away from that to create a safe cutout. At first, you can draw the path roughly.
In this step, you don’t need to worry about perfection. It will fix gradually in the next steps. You need to end the path by clicking on your starting point.
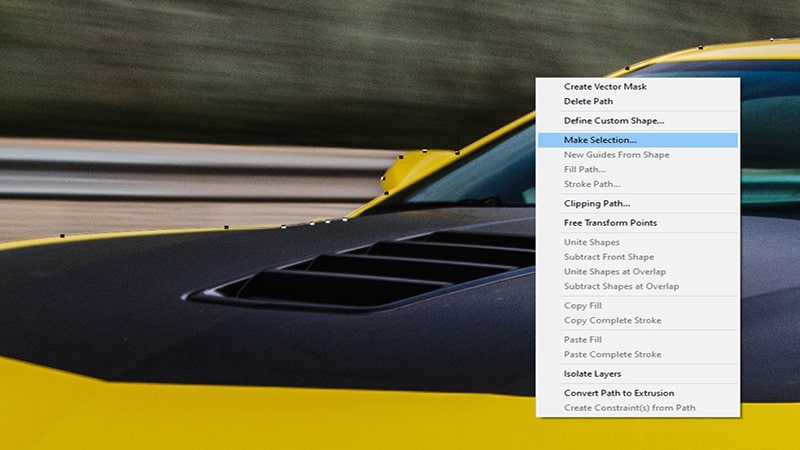
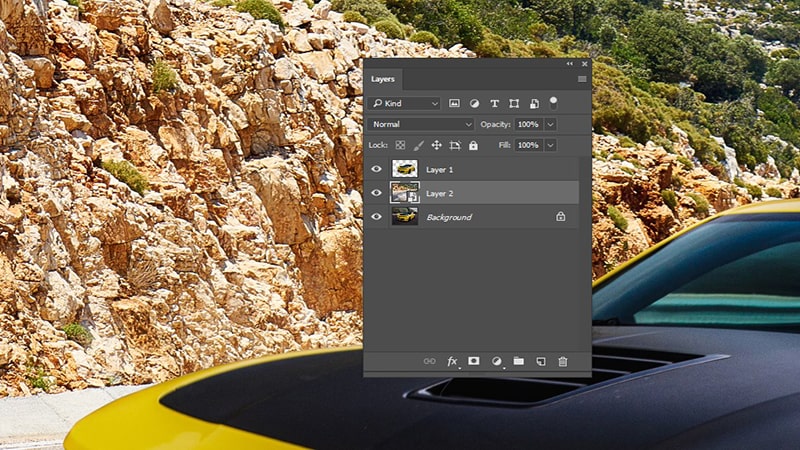
After that, right-click on your mouse & select, Make Selection. Then choose a new selection & press, OK. It will create a new layer.
Step 2: Removing and Replacing Background
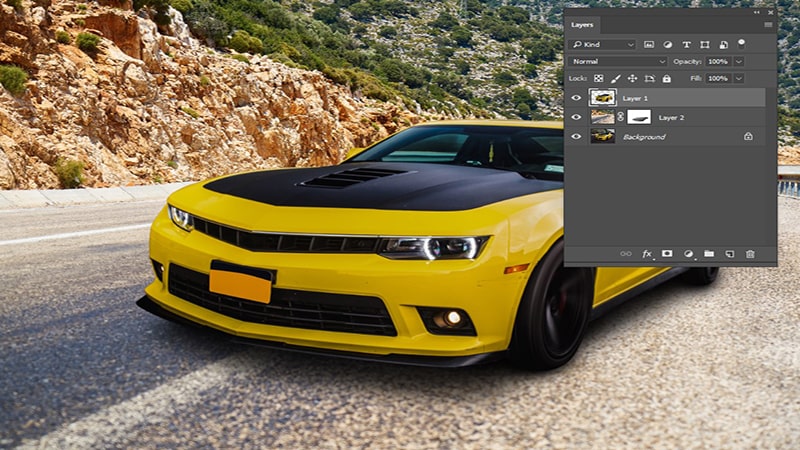
Now it’s ready to paste a new background between the original photo & the created clipping layer.
While you are choosing the background, you must choose a similar angle & balance lighting photos. The new background should be free of any imperfections.
Step 3: Compositing into New Background
It’s better to decrease the new layer’s opacity to match the angle of the scenes accurately. You can move the new background position to bring the perfect angle.
If you want to remain on a basement road then the compositing will be much easier. As it is already positioned in a realistic way with proper shadow & angle. You don’t need to attach additional shadows.
To include the base road now, from the right bottom of the photoshop add a layer mask to the middle background layer. Then choose a soft brush tool from the toolbar. You need to paint the mask with this brush. As a result, it will erase the foreground & return the original basement of the car.

In automotive photos, sidewalks are very common & popular. It is wise to use it as a bridge while blending two backgrounds. You should adjust the brush size & enter the X key to swap the brush between black & white. It will help to restore the mask area.
Step 4: Fine-Tuning to Make Your Edits Realistic
Now it’s time to polish your new background to make it realistic. Well, some little adjustments are enough to make your compositing more natural. First, keep your mouse pointer on the particular layer & right-click on it.
Then choose Convert to Smart Object. It’s essential to protect your valuable images. If you accidentally make any changes, it will help to restore the previous state back. Isn’t it lucrative?
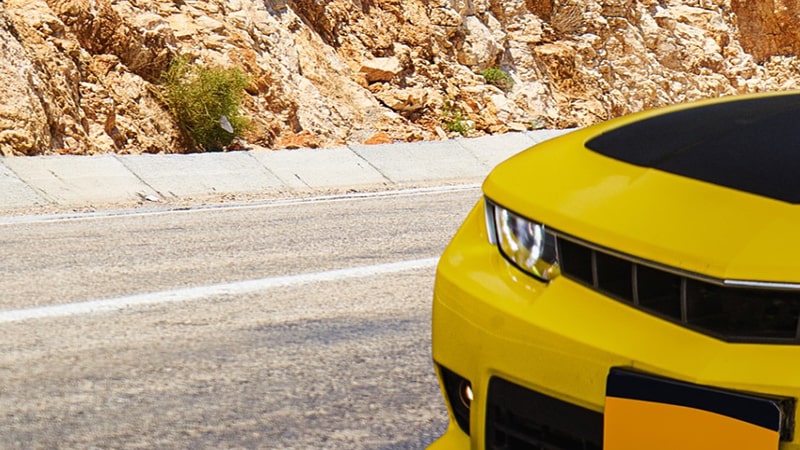
You need to compare the original background with the new one. Click on the eye sign from the new layer & disable it to get the differences. In our case, the original background seems much blurry. If your one is blurry then follow the below steps.
Select Filter-Blur Gallery – Field Blur

But before doing this task, you need to activate your layer.
Adjust Blur Tool
Here your target is to bring the original image effect, enhancing the blur value to get the exact output. I guess it will be a small value under 8 px.
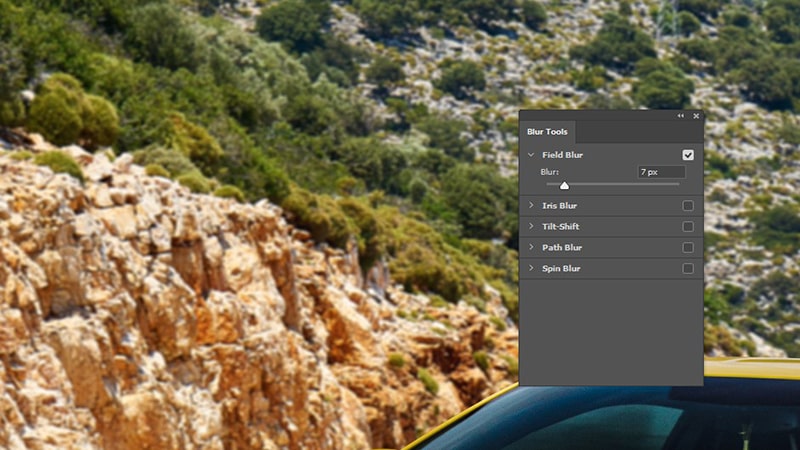
The blur tool also helps you to blend the two different backgrounds in your image.
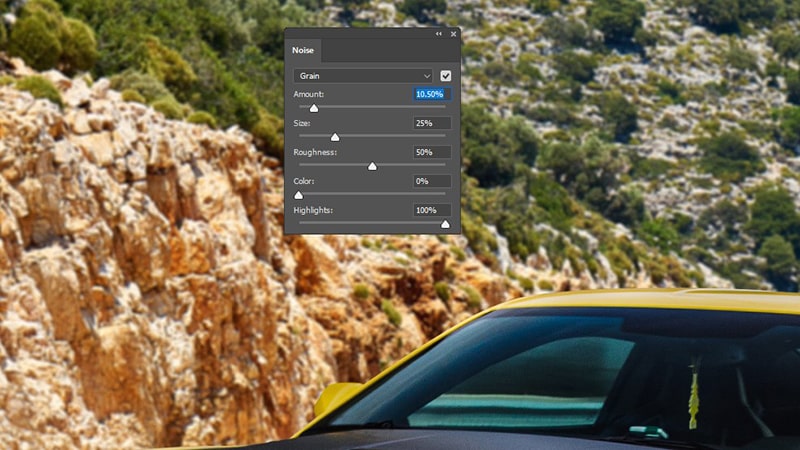
Adjust Noise
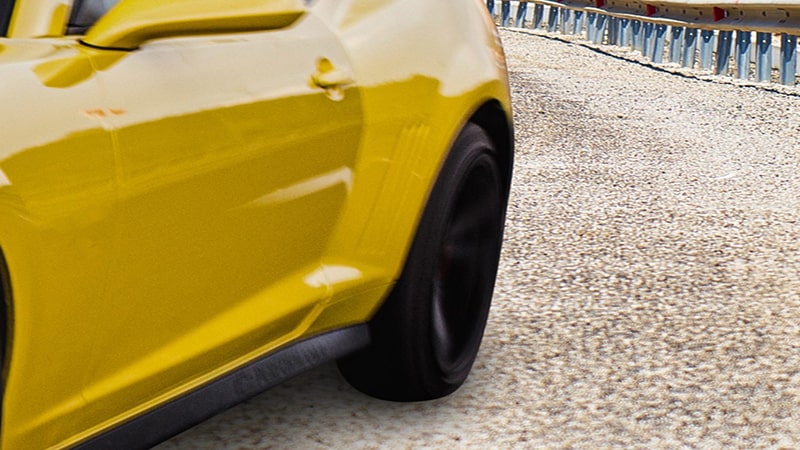
Your car may contain some ISO noise like the below pictures. But the new location is spotless. To match it, you should increase the Grain amount slider. It will generate a few noises in the background.
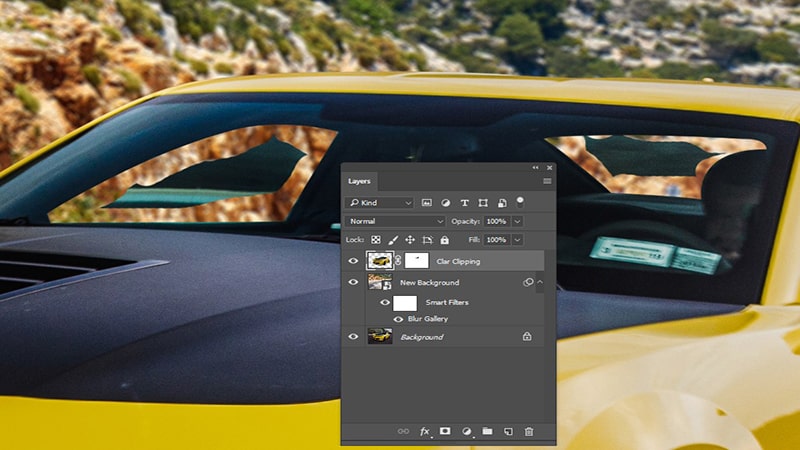
Remove Unwanted Reflection
While we clip the car from the background, we are using the out edges. As a result, the window contains the original reflection. It must mismatch with the new background. You need to create a new layer mask & choose the brush tool to remove the unwanted reflection to display an appealing background.
Remember; don’t do much polishing so that it looks artificial. It is wise to choose moderate hardness to avoid artificial edges.
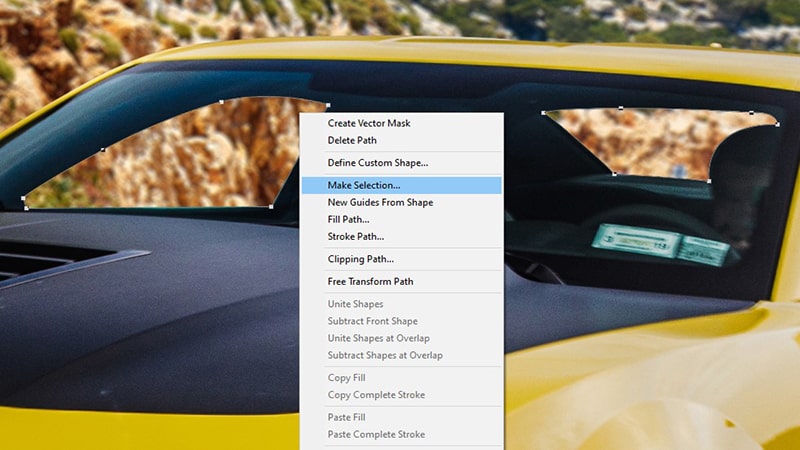
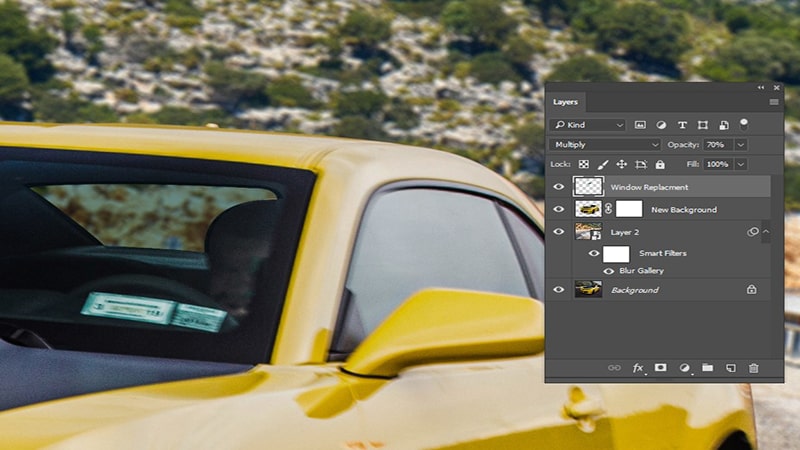
Draw a New path For the Glass and Make Selection
The glass should contain some reflection. It won’t be good to keep it clean & bright. Let’s start to draw a new path around the glass using a pen tool. Then make a selection & create a new layer.
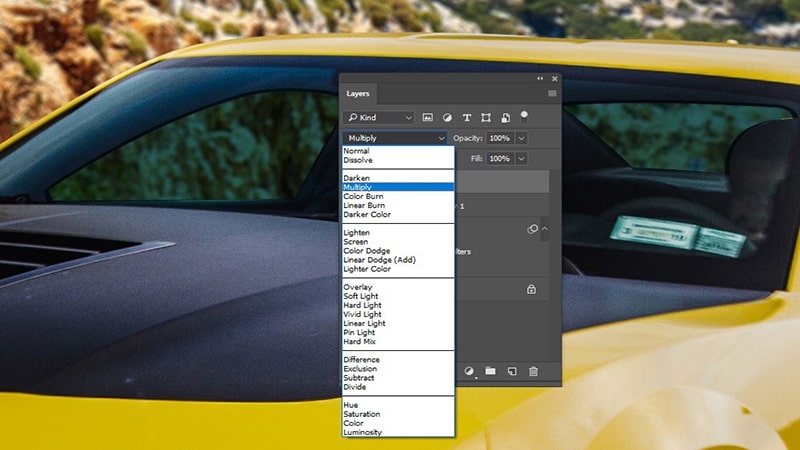
Switch Blending Mode to Multiply
Now, you can take a color sample from a nearby window & fill the selection. You should represent the new background through the window. So it is mandatory to switch the blending mode of the layer to multiply.
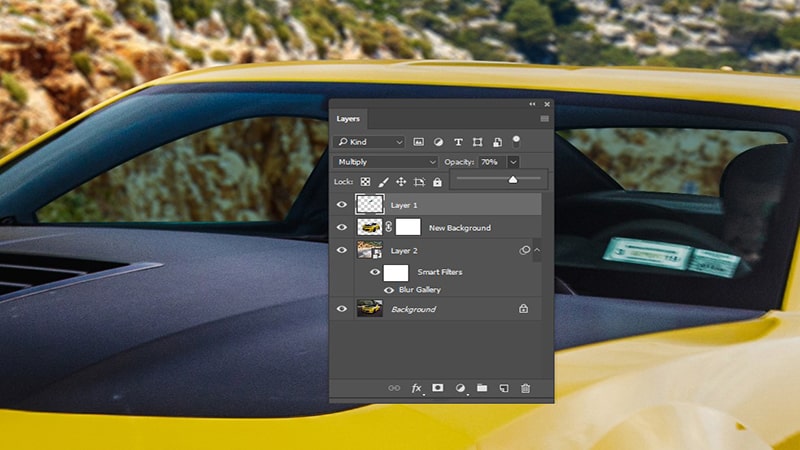
Decrease the Opacity
Next, you need to decrease the opacity of the window overlay layer. It is essential to make a realistic background view through the window. Unless it gives a natural view, keep reducing the opacity.
Fix Hard Edges Using Blur Tool
Earlier, I mentioned that we would fix the outline later. We are drawing a rough cut out. When we zoom in on the photo, we will find out the hard edges. To fix those edges, choose the car layer & active Blur tool.
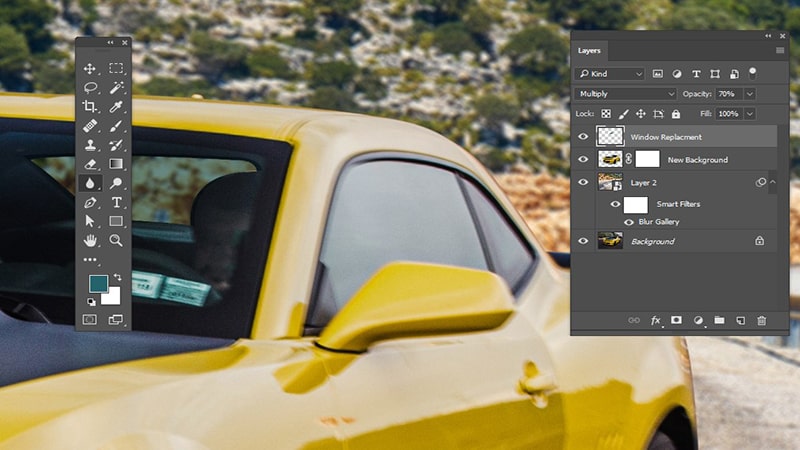
Now it needs to decrease the tool 50-60% from the top toolbar. You will get a small brush tool from the left toolbar. Pick the brush & paint over the hard edges to bring a realistic view.
Step 5: Final Retouch Up
To give a final touch-up of car compositing, color grading & lighting is excellent choice. You can use any light overlays from the internet according to your choice. From photoshop open two or three files.
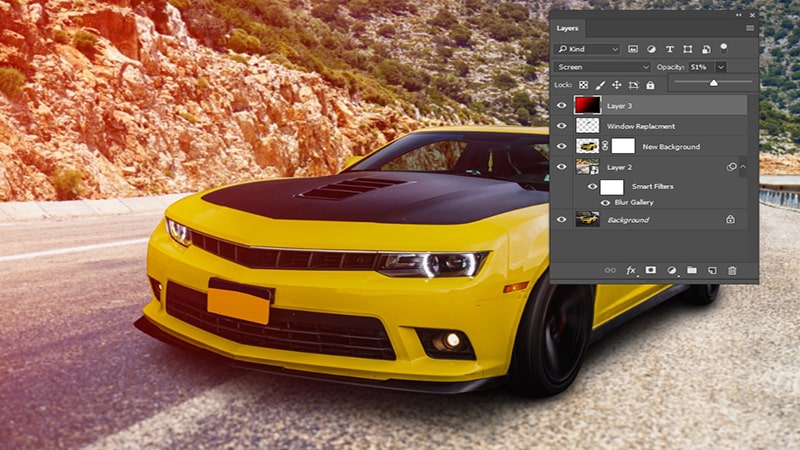
Now copy it & paste it into a new document to do scaling. After that, you need to switch blending mode to Screen. It helps to hide the dark background & highlights the vibrant portion to focus the image.
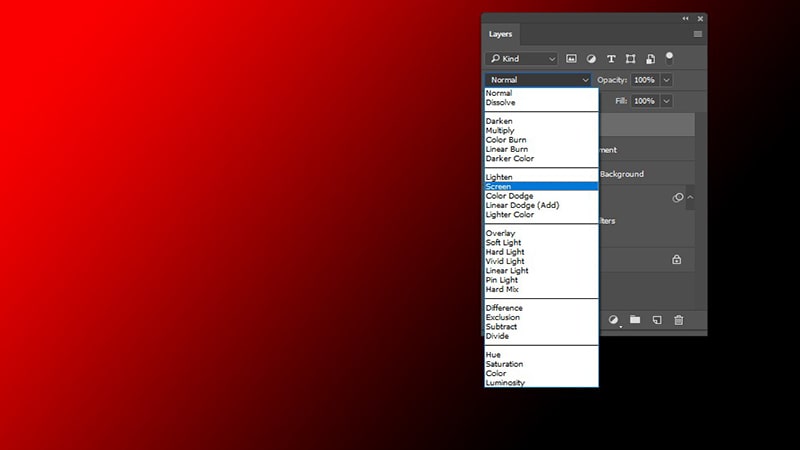
Finally, decrease the opacity of the lighting layer to modify the effect. This extra layer can magnify the car’s beauty & represent some vibrant lighting across the image. It can grab attention at first glance.
See the below final output.
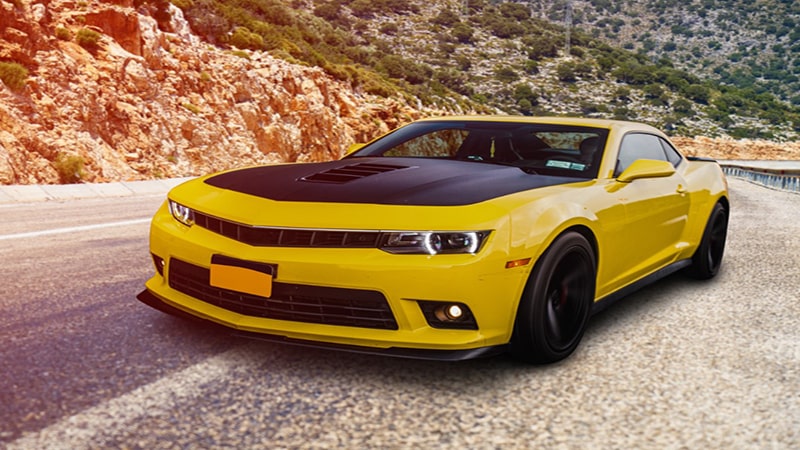
A little effort can change the whole outlook. An appealing background enhances the beauty of the image & makes it eye-grabbing. Including the original road also added a realistic vibe. Let’s compare the two photos & see the difference. It will be a turning point for your automotive business.
If you want to win the business competition, composite car photos into a stunning background.
Photo Shooting Tips to Take a Perfect Photo for Compositing Car Images into Background
Do you want to attach a different background with your car shots? It’s wise to capture two photos with similar style & lighting. In the outdoors, you should keep it in mind.
If you try to blend the car into a background with different angles & lighting that will result in an artificial view. So, it’s essential to choose a similar angle background.
From my experience, I can suggest you use a green or vibrant solid contrast background for your automotive photos. This type of contrasting shot makes it easy to cut out the subject from the background.
Low contrasting shots are really difficult to cut. It’s not good to take risk of harming image quality. Precautions can give the best output.
As you will do compositing you don’t need to worry about the location. You just focus on angle, lighting & detailing. Then you can decide about the new background. You can take different shots for the background.
Following the above process, you can easily replace the background & get an attractive car photo. It will make it possible to display your car beside the ocean or desert.
You can do your Photoshoot with the Smartphone. Car composition saves you from buying expensive cameras or other gear. A simple tripod is enough. Now start your photoshoot. The next phase is compositing the car into a new background. That will fix all the imperfections & deliver perfect shots.
Final Verdict Composite Car Photos
Composite car images into a new background in Photoshop needs dedication & a creative mind. A wrong background transformation can waste your effort & time. Follow the steps carefully & do some practice.
An attractive background composition can change the whole story. It is enough to make your image eye-catchy & bring focus on the car. The best part is a perfect background that helps to highlight the cars & remove all distractions.
These simple steps help to create your brand value through millions of automotive photos.
FAQ on Composite Car Photos on A New Background
What is the Best Software for Composite Car Images?
How to Select the Right Background for Cars?
How Do Backgrounds Affect the Main Subject?
On the other hand, an appealing background brings engagement & focus on the subject. It helps to meet your purposes by reaching your target audience.
Is it Expensive to Take Professional Help for a Composite Car into a New Background?
Expert car editors have the power to bring appeal & make the image outstanding. They can fix any complex imperfections & provide perfect shots to grow your business. Try it once you will feel the power of high-quality images.