In this era of competitive marketing attracting a client with RAW images can be an Immature decision. When you snap a car photo and if it seems dull and poor be sure you have captured it with the wrong settings. This means, there is no color and emotions available in your picture.
Now the question is how to edit car photos in Lightroom to add a vibe to the image?
Using a number of editing tools, you can accomplish this task. Either you can do it by yourself, or if you are a professional photographer, you can hire Photoshop services.
This tutorial will allow you to learn how efficiently you can edit car photos in Lightroom.
Below is the image which I am going to use.

So, let’s start the tutorial.
Step by Step Car Photo Editing Tutorial
If you are a beginner or a pro in the photo shooting niche then you must experiment with different car photography tips and ideas to get the best outcome possible.
Well, note that the process is not much complicated but the experience can differentiate the final outcome.
However, These are straightforward steps, and in the end, you will be able to get an impressive car photo that everyone will start praising about your creative work.
01: Follow the basics
I follow these basic rules to edit car photos in Lightroom to do these types of professional works. Although I use photoshop or Lightroom for car editing. But, This section is similar to “vegetables in the roll.” Because the basic exposure will be taken care of in this section, which will give the final look of the image.
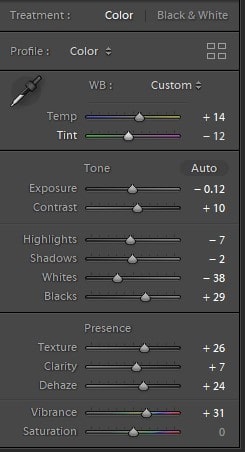
Go to the “Basic” Panel first from the top, and we will start with adjusting the white balance. If you look at the original image, you will find it a bit warm and greenish. At this point, I will reduce the temperature and will set it to 5,600. Then we will set the level of the tint to 10.
You will find a lot of sliders below these 2 options, and you can adjust them as per your requirement. Simply make sure you have not increased the level of exposure and highlight options too much. If you do so, you will lose some essential details such as color along with texture.
The thumb rule is, keep the clarity level less than 30 and more than 0. If you don’t follow the thumb rule, you will end up with a dramatic image, which will look like unprofessional editing.

02: Adjusting the Color
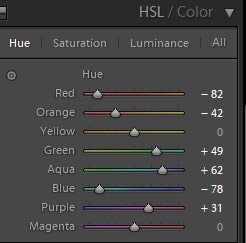
In this step, I will make a detailed adjustment of every color present in the image. You will find an icon named “HSL/Color/B&W” and click on it. And then select “All” so that you can see all colors. So, let’s begin adjusting the colors.
Red: I will increase the saturation to give a vibrant look to the image.
Orange: This image doesn’t contain any orange color, so I will not do anything with this color adjustment.
Yellow: A lot of things need to be done with yellow color as the car itself is yellow-colored. I will increase the saturation to make the paint color fresh. And then reduce a little bit in the luminance, which is actually brightness. Reducing the luminance will store the integrity of the image.
Green: The grass looks dull in the image. So I will add life to them. For this, I need to remove the saturation from the image. So, drag the slider to the left to eradicate the saturation. Continue the same to the Hue slider to remove it entirely by dragging the slider to the left side. And in the Luminance option, I will pull the slider to the right and set the level to 50 so that the grass looks greener than before.
Aqua: The window has a teal ting view. To reduce the view, I will increase the Hue level to 50.
There are some other color adjustments also which I am not doing anything for this image.
Now it’s time to change the emotion of the image and to do this I will work in the Split Toning Panel.
Adjust the Hue slider first and set it to 50 and then drag the slider to the left side to set the Saturation to 20. But, I will not make any adjustments to the Balance Slider because the image color will become more complicated if I do this.
In the Shadow option, I put the Hue and Saturation level to 205 and 10, respectively. This way, the highlights will get a yellow or orange look, and the shadows will get a bluish look.

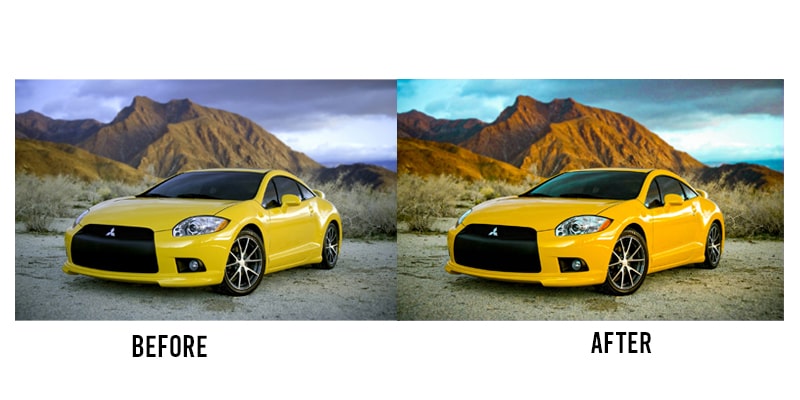
Look at the below image comparison where the image receives a much-refined look as the exposure along with the color has changed than before.
Now it is time to start working with the Graduated Filter.
03: Graduated Filter Utilization
The truth is, the image will become more amazing if the subject gets a beautiful look.
If you look at maximum car images, you will find the car is on the road, and the sky also gets focused on the photographer. And you can add a vibe to the image if you give a bit of a dark look to both road and sky. In Lightroom, you can do it using the Graduated Filter.
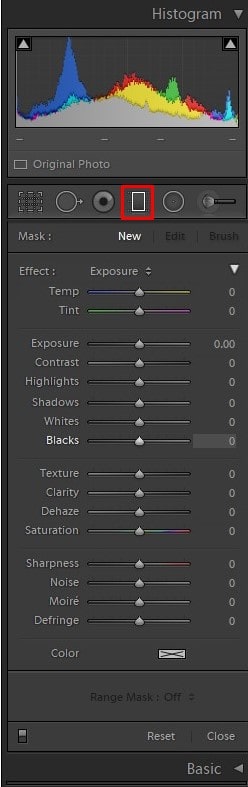
Well, hover your cursor at the rectangle, which is placed on the upper portion of the image. Then drag the car from the bottom of the picture. Now, you will get 3 horizontal lines with a black dot placed in the middle.
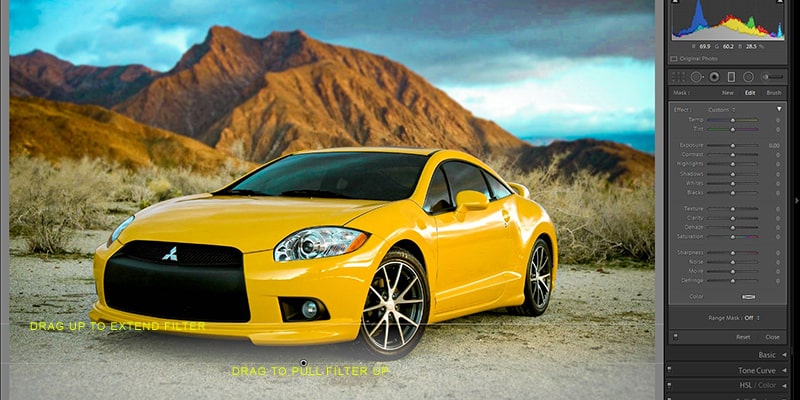
If you want to remove the filter, drag the middle line. And dragging the top line will allow you to make the length adjustment of the filter.
To see the elected overlay of the filter that you have made, press shortcut key “O” from the keyboard – you can see the arrow by ticking “Show Selected Mask Overlay.” To give the road a dark look, I will reduce the exposure and set it to -1.50.
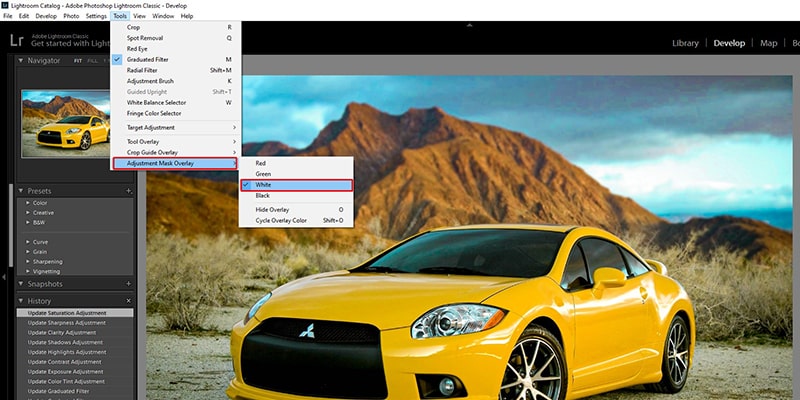
Changing the overlay color in Lightroom is also not a big deal. To do this, follow below.
Tools > Adjustment Mask Overlay > Select any of the colors from the list.
So, the process of Graduated filters is complete for the road. Now, I will create another Graduated Filter, and this time it is for the sky.
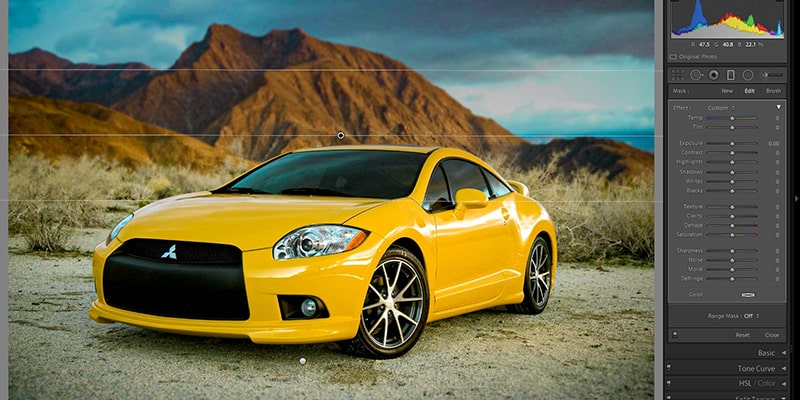
The cloud looks dull in the image I want to give a darker view of the cloud. Thus, the image will get a more dramatic look, and the car will also become more focused.
In this Graduated filter, the highlights will be wholly lowered, exposure will be pulled down, removing the haziness and adding some warmth to the image.
The main trick is to give the full focus to the car so that the viewer directly looks at the car. But while doing this, I keep a close eye not to lose the natural look of the image as well as the environment.
04: Final Touch Up
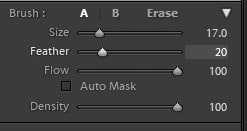
Although the editing is over, I want to add more vibe to the side windows and enhance the wheel contrast. Adjustment Brush will allow us to do all these workings.
The 2 icons of the Adjustment Brush are placed at the right side of the Graduated Filter icon. In this image, I followed Flow: 100, Density: 100, and Feather:20. And the size I kept on 17. However, changing the size is depending on you.
To enhance the wheel contrast, I increased contrast, clarity, and saturation to 30, 30, and 20, respectively. Don’t worry about making the selection as strongly round. But be careful not to select any portion of the car or the road.
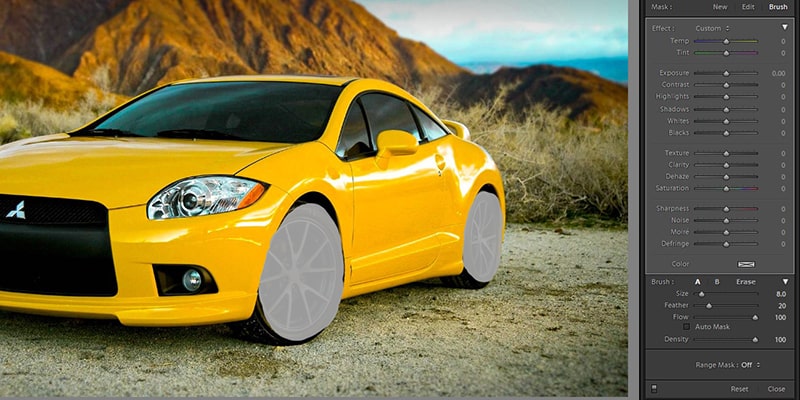
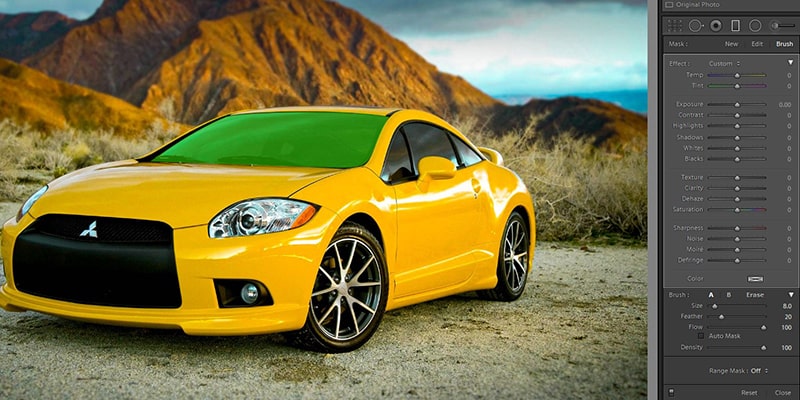
The process of making the side windows dark is pretty straightforward. Simply select the area of the side windows and set the Dehaze option to 40. Just confirm you have selected all the portions of the side window accurately. While doing this process, don’t rush. Otherwise, you will end up in a mess.
Hence, hand if you have more images than you can handle or need batch car photo editing and retouching services providers.
Conclusion
Following the above simple 4 steps, you will be able to change the full view of the image. The good news is that you can follow this process for any automobile photo. Whether the image is an action or static, you can add a new vibe to any automobile image as per your requirement.
We all know Lightroom follows nondestructive features, so if you need it, you can redo any of the processes if you don’t like it.
Overall, I believe this tutorial will help you a lot to edit car photos in Lightroom.
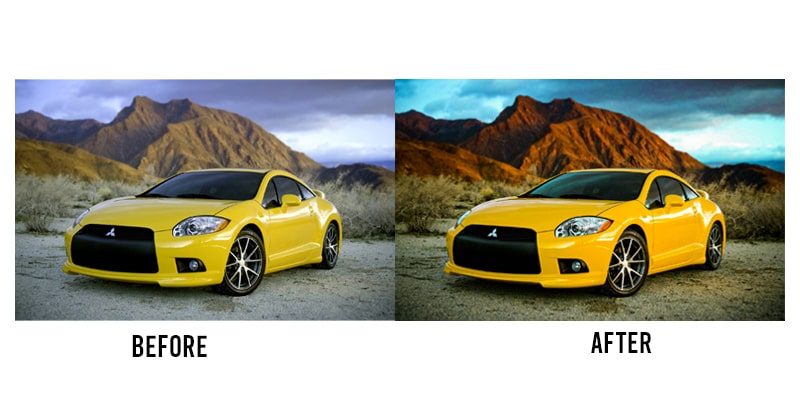
Find the below comparison of the image.